Inductive displacement sensors feel how cherries grow
Long-term measurement of the growth of cherries on the tree requires slim displacement sensors with a high resolution, low force, a high protection class and low current consumption.
This measurement task requires a displacement sensor that operates without wear in a field test with high humidities, even to the extent of drop formation.
The inductive gauge in model series SM34 fulfils these requirements and was selected for this task. The displacement sensors record strokes of up to ± 10 mm with resolutions in the µm range.
The plunger is pushed into the idle position using a spring. The measuring tips and the spring can be replaced for different measuring tasks.
The robust, encapsulated design of the sensor allows it to be used under difficult environmental conditions.
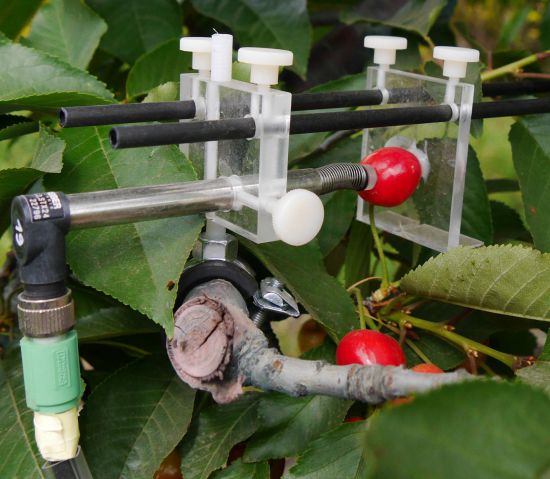
During the described use (carried out at the University of Hanover, Institute of Horticultural Production Systems, fruit-growing department) the gauges are attached in cherry trees to measure the diameter changes of the cherries. The diameter is measured with a resolution of 3 µm, and is used to calculate the volume of the fruit.
Because of the compact design in a housing that is a mere 10 mm thick and the light weight, the displacement sensor is easy to attach to branches of the cherry trees.
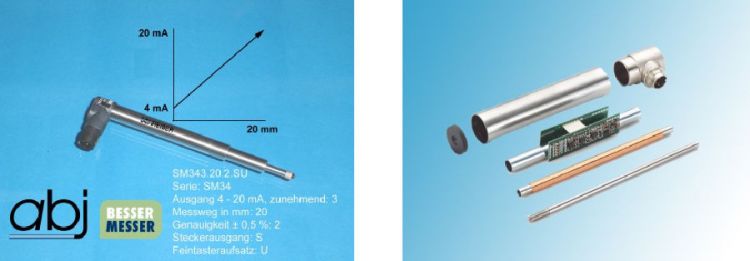
The integrated microcontroller evaluates the axial shift of the Mu metal core. All of the electronics are integrated in the housing, and provide a displacement-proportional output signal.
The low power consumption makes it possible to supply the sensor using a low-cost powerbank. The output signals of 26 displacement sensors are read out simultaneously and stored on a data logger.

Displacement sensor installation next to cherries in the tree
(Martin Brüggenwirth, Andreas Winkler, Moritz Knoche. 2016. Xylem, phloem and transpiration flows in developing sweet cherry fruit. Trees, DOI 10.1007/s00468-016-1415-4)

The typical version of an inductive displacement sensor consists of a hollow coil core with strictly symmetrically wound coils, magnetic screening with a high degree of permeability and a round, rust-free steel housing. The spaces between the coil and the housing are all filled with hardened plastic.
The nickel-iron alloy plunger moves through the body of the coil and changes the inductance of the two halves of the coil in opposite directions. The drill hole of the coil body and the diameter of the plunger are selected so that contactless, wear-free movement can take place.
The contactless measurement is a major advantage of the inductive displacement sensor, and makes it possible to use the sensors in machines for material testing and on vibration testing tables, among other things.
Because of the infinite resolution, the tiniest of plunger distance changes can be measured, the only limitation being the noise of the integrated electronics.
The almost unlimited service life and outstanding reliability also allow the sensor to be used in sensitive applications such as satellite technology, aircraft or industrial automation. The integrated electronics evaluate the inductance change which is caused by the axial shift of the NiFe metal core.
Operating voltages of 5, 12 or 24 VDC and the low operating current make use in mobile systems also possible.
The displacement-proportional, analogue output signal of 0 ... 10, 0 ... 5 or 0 ... 4 VDC can be directly processed by many evaluation units.
The version with current output of 4 ... 20 mA is available with 2-wire technology.
The miniature sensors with protection class IP67 can be used in extreme environmental conditions such as oil mist, mud, rain and dust, and can withstand shocks up to 250 g SRS and vibration of up to 20 g rms.
